ScoretestV1
|
—————————————————
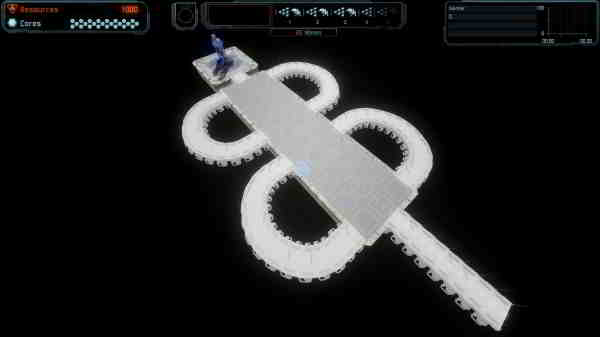
Author: Grimlar Download Map: – Authors Map Description –This map has not been made with entertainment in mind. I imagine it will be very boring for most players. Instead this map has been put together for players to test how the scoring system works, to try and see how different approaches might affect your score, or just to try out different towers on some of the less common aliens. (I have been meaning to do one of these since autumn 2014, but life and other maps always kept getting in the way. So my apologies for the delay. 🙂 ) – There are several tests. Different scenarios to try out, I guess you could say. Each test has several parts where one of the components of the scoring system has been changed. Hopefully comparing results for similar tests will will make it easier for people to interpret the resulting changes to their scores. I’ve not done any analysis on the results myself, as I dont want to prejudice what people find. If you want to, you can find how I believe the scoring system works in the comments below. That opinion may prove to be inaccurate. In the end though, provided we all understand the scoring system better at the end then the map will have achieved what was intended. – What is included: Story – Standard mission script. Mainly here for completeness. Test1 – Five Walkers. All the same health. Each test has four versions. Unless otherwise noted all aliens have their health multiplier set to 1, ie 100% of base health. I would suggest that to get the best use out of this map, you run one test, note your score and then run a slightly different test, building in exactly the same way and compare the scores. This should allow you to see the effect of changing conditions/scoring rules. Or you could run exactly the same test, but vary the tower arrangement slightly to see how that changes the result and continue in that manner making only small changes and comparing the scores each time. – I’ve given it a bit of testing. It should do what its supposed to, but its still a work in progress really, so please do report any bugs / inconsistencies / problems you find below. Likewise, if you think there needs to be any alterations to the timing/wave composition or have an idea for a new test, again, please post it below. – ScoretestV1a ScoretestV1b |
 |

I struggled a bit to get gold on story mode. I am very sorry to say that I had fun despite the intention of the map not being to entertain 🙂
Thanks for the positive feedback, I do have some updates for the map, but Im having some hardware issues at the moment, likely either with my main steam hdd or my motherboard, so not sure if Ill be able to uplaod them today or not. My apologies for the delay either way.
Hey Grimlar,
What I loved about this map is I learnt that I still don’t have a clue of what I am doing 🙂
I did lean how playing on normal speed helps with scoring vs fast forward.
Great concept and thank you for your efforts.
Cheers from Australia 🙂
This is my current understanding of how Scoring works.
To the best of my knowledge this post:
http://steamcommunity.com/app/221540/discussions/0/613938575217160473/#c481115363859405779
best explains the scoring system, at least so far I currently believe. So, credit/respect to Hanbaoluo, not just for working it out from missions more complex than this one, but also for being able to explain it far better than I could.
The only things I would highlight/add to that are:
1) You ONLY get score when an alien dies.
This means that the end of wave bonus for the last wave is probably useless in tems of score, because all the aliens are already dead. (Which is why the remaining resources number on the score summary page often doesnt really mean much.)
2) Your resource total for scoring purposes includes the sell value of all the towers you have placed. (Even if you cant sell them.)
This ensures you always gain score when an alien dies, even if your resources number on the top left of the screen actually shows 0, because of what you have already spent on towers. It also means that building a tower a little earlier than you have to doesnt actually affect your score too much. (The difference is only 25% of what you spend.)
Also:
3) The total amount of end of wave bonus is set for any given mission.
4) The duration of the mission, at least up to the start of the last wave, is also fixed.
5) The trickle stops when the last wave starts, which together with point 2 means that the total resources from the trickle is also fixed.
As such, barring little variations/inaccuracies between runs, use of the backspace key, orbital weapons that add resources etc the total amount of resources that you can get in a mission is fixed.
As such the only things a player can do to alter their score are change the towers and change the timing. Ie WHEN/WHERE you build the tower, WHEN the aliens die and WHEN you gain the end of wave bonus. (Ok, and if you build a score boost upgrade.)
A general strategy of keeping each alien alive as long as possible, will usually increase your score, ie gain more resources from the trickle before the alien dies.
However, it may be worth considering whether there are any boss aliens in the next wave, in which case getting the bonus for killing all of the current wave before the boss dies may give you a larger score overall.
I stress again, this is only what I believe happens.
Hopefully you can explore/test/prove this for yourself this with this map.
All tests done on elite
Test 1 only one tower used.
Test 2 only two towers used.
Test 3 only five towers used with the lost of six cores for each of the 4 tests, could have saved cores after the first test but spent the same amount for each test to get the same end in each test.
Tests 4 &5 only 4 towers used for all 8 tests.
Used the same tower for all tests and never use that tower in game as it just doesn’t work in game the way in should.
Thanks for the post, although Im not sure which point you are trying to make?
Also Im curious, which tower are you referring to and what does it do incorrectly?
Cannon tower is useless at targeting in game if their are more than one target in range but on the test map it owns. The main things to do for better scores is don’t backspace or fast forward for the whole game. My real problem with the game is that the longer you keep the invaders alive and not touching the cores the better your score will be. That is just a crap way for the game to work. The game should reward you for the faster you kill a wave not how long you can keep that wave in play for.
Ah right. (Apologies in advance for the long post, I tend to ramble. And of course, just because I believe this to be true, doesnt mean it is. Try it for yourself and show where Im wrong. 🙂 Thats what this map is for. )
–
To be honest, I think most of the towers have problems targetting, I also think its probably deliberate on HPE’s part, to make the tower upgrade items which change the targetting priority seem more useful.
I think its more noticeable with cannon towers because there is no DOT element with them. With lasers if they target an alien for a second then change target, it usually keeps burning until the laser switches back, so you get fairly constant damage unless there are too many aliens.
Having said that, lasers have a weakness too in that they often spend too long heating up an alien thats already at max temperature, which is a waste.
TBH I think a lot of it comes down to line of sight issues. Tthe game seems to take into account obstacle height, including other towers, boost towers, map elements and so on when determining whether a tower can ‘see’ a target. If an alien goes out of sight/range then the tower generally changes target if there is another available. Which to be fair, is to be expected.
Lasers will still swap target eventually though no matter what because they are more efficient when they do. Cannons are supposed to have a minimum range I believe and take longer to turn and fire than a laser, possibly the same issue for owers. Meteors seem relatively unaffected by line of sight issues though, possibly due to the arcing path and AOE nature of their attack.
Plus, sometimes even with a clear target any of the towers may just do nothing for a second or two.
If you try Cubical Moments Part1 or 2 for a few waves you will probably find that many of the towers target the aliens much better if you dont build a boost tower under them. (The cannon tower may be the reverse due to the minimum range limit.) Of course, that lowers your overall dps, but it does help the targetting.
–
As for the use of backspace changing the score, the DG games have never been deterministic, there has always been some slight variation between runs, target selection, minor differences in path selection etc. I suspect its quite deliberate on HPE’s part to try and preserve interest when a player comes back and runs the map again to get a better score, and provided the differences are minor it shouldnt be a problem. Except that as you note, this time the differences seem to be larger.
–
Fast forward has always had a slight penalty to the score associated with it, (in DG1 too, ) whilst its inconvenient, I guess I can accept it. It can even be useful if you want to change the way a particular wave runs just slightly.
–
As for killing aliens quickly or slowly, as I’ve said elsewhere, whilst I believe that keeping aliens alive longer is a valid tactic and works well on quite a few of the maps/waves that are available, (due to the trickle usually giving more resources than the end of wave bonus,) I think that you should be able to improve your score by quickly killing those waves with a large end of wave bonus, especially if the next wave is a large boss wave.
This is one of the things that I was hoping to show with test 4 and 5, with the crasher and the walker. If you try test 4 part 4 and then try test 5 part 4 with the same tower setup, (easy difficulty should do,) one of them should give you a better score, even though it is essentially the same setup, just a question of which order you kill them in.
Anyway, again, my apologies for the long post, hope some of it made some sense at least.
I agree 100% with Trash.
Once I learnt to keep Aliens alive as long as possible the game became “a job” and not as much fun.
I know I don’t have to play like that but you wont beat the high scores without doing it and some maps that doesn’t even help 🙂
Im not disagreeing with either of you, I hope. Just a different point of view of the same system arrived at under different circumstances. Ie trying to explain what I see happening when I play the same mission (over and over and over 🙂 ) in order to playtest/balance it.
Ultimately the answer seems to me that we need to see if we can build some maps that work a little differently. 🙂 We can try at least.
All tests on elite
Test
4.1 score 1229
4.2 score 1638
4.3 score 1770
4.4 score 2298
Test
5.1 score 1224
5.2 score 1602
5.3 score 1734
5.4 score 2263
Like most of us, Im certainly interested in what people find out about the scoring system.
I would have thought that the story mode was the only mode to hold any interest in terms of score, and to be honest I added it as an afterthought, although Im happy to develop it if people are interested.
Other than that, if you think some of the tests are worth sharing/examining in more detail then by all means post the scores.
I suppose MY main interest for now is if people want any of the tests changed, or new stuff added, ie perhaps on one of the tests, the gap between the waves might be too large or too short to really show what people want to find out about the scores, or if they want Juggernauts instead of walkers or more mixed waves and so on.
Basically, what aspect of the scoring system do you find most obscure and what can I do to help highlight it?
Interesting & well done for trying this.
Do you want us to publish our scores/results?
Thanks a lot. I will use this to test how different towers work against different aliens and also which works best of different types of tower upgrades. I bet I will have some fun too 🙂